1. Engine - Crankcases and Crankshaft
Crankcases
When I purchased the basics of the bike back in 1988, the major selling
point was that the crankcases were in absolutely excellent condition.
The engine number dates them as an extremely early sandcast HRD pair of
1947 vintage. There were no noticable signs of cracking, bad threads or
graunching which you often see with these crankcases, also I was told
whom they were purchased from and therefore had good reason to trust their
history (I also have an idea how much he paid for them and they were'nt
cheap even back then!).
As it turns out, all these years later I have not really had cause to change that view. The crankcases came already painted in what looked like black 2 pack and there were signs that the correct etch primer had been applied under this. All I chose to do was flat the top coat down and add an extra coat of 2 pack to give a high gloss finish.
Bearings
I spent some considerable time examining all the crank case/timing case
fittings and degreasing/cleaning the internal surfaces. The main bearings
were already fitted and looked to be in extremely good used condition
with no noticeable wear. Normally as a matter of course I would fit new
mains into an engine I am restoring but in this case I felt it would do
less harm to keep these in (lets hope I am right!).
Incidently, something that is not often talked about in Vincent literature
- I am told that Vincent engines are fitted with '3 Dot' main bearings.
This means that before the bearings are fitted they will run quite loose.
However, this slop is taken up once pressed onto the mainshaft and sunk
into the crankcase. The important point to remember here if you are fitting
in new bearings is that if you fit standard bearings everything will seem
fine before fitting, but they are likely to be destroyed in a very short
space of time once the engine is ran.
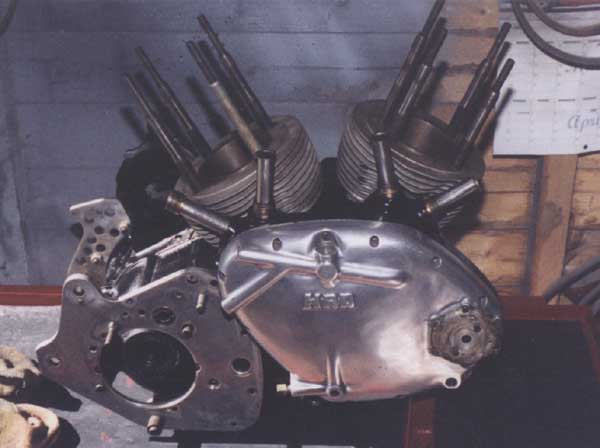
Crankcases and main castings - as bought
Bearings were good, but grease had seen bettter days!
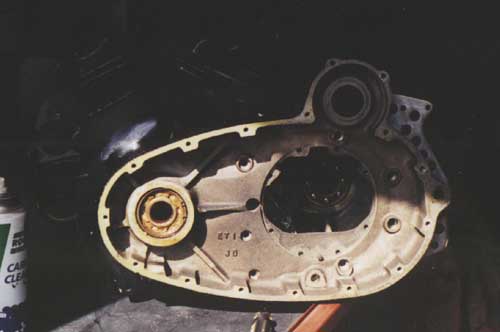
Oil Pump Housing
When I bought the bike most of the internals supplied were worn out (the
bike was never sold as a 'complete' bike and most of the internals were
only there as patterns). However, included in the good parts was a brand
new 2-speed oil pump, which I have now fitted. As expected the job was
not simple but I have an understanding wife who was not totally surprised
to see her oven full of Vincent crankcase! With the correct pullers made
on the lathe the job went pretty much to plan and the new bearing went
in with no problem.
I remember that when I bought the bike, 2-speed pumps were all de-rigor
for serious competition work but have since seen some correspondence to
say it makes little difference. Never the less I feel happier with this
one fitted.
Most of the spindles in the timing case looked to be in excellent condition
- which was good as I dident fancy the idea of pulling them out. Unfortunately
the hole for the breather spindle seemed to be oversize as the new spindle
dropped in. Again, Maughan's came to the rescue and made up an oversize
spindle for me.
While in the timing case, the other thing I noticed was that the casting
above the main bearing had not been drilled. This was a later feature
to allow better oil flow to the bearings I believe, so I got the drill
out and drilled away.
Probably the most time consuming job was to 'Lightningise' the crankcases, that is to say, that I laboriously polished the inner faces of the crankcase walls. I am told this was carried out on all genuine Lightnings, but I am not sure if it would really have made any difference to performance. (somebody out there I am sure will provide evidence to prove me wrong and then I will really feel good about all the time I spent doing it!).
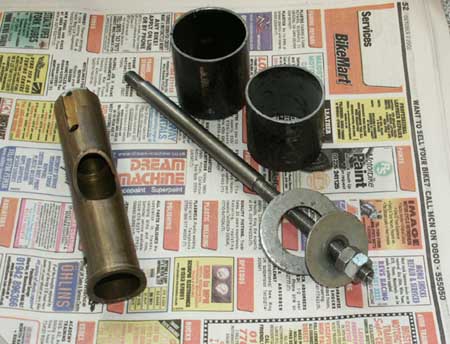
Simple tool for extracting old oil pump bearing from crankcase (on left)
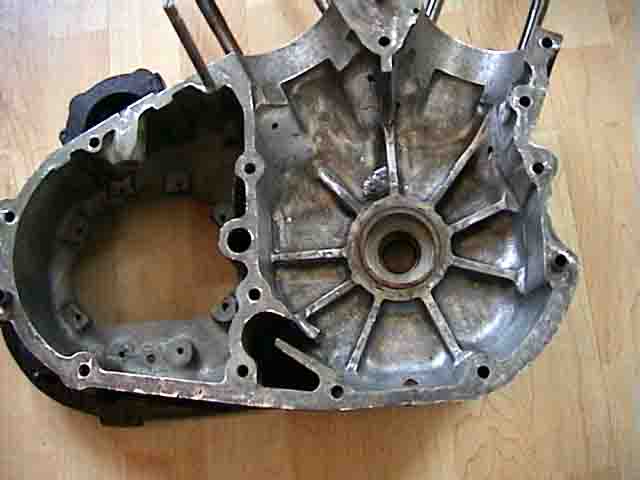
Crankcases undergoing polishing
The bike came with a full set of Series 'B' crankcase studs - i.e. inners and outers. As the crankcases was also fitted with the bronze inserts for the inners I was keen to retain these. The studs were fully cleaned on my bench mounted rotary wire brush (this is a job I carry out on all non-new parts before fitting). All studs went in beautifully until I got to the very last one - outer number 8, at which point it seems to go very tight after 2 full turns in. I took it out and examined but it looked fine so I tried again. Again it went tight but I decided to carry on, bad move!
After a couple more full turns it locked solid and on removal the stud thread had picked up badly. I have to say, I was perplexed by this, but at the time put it down to the fact that this was the only stud dull-nickel plated, so it might have had an oversize thread. At this point I left the job and moved on to another area.
It was only months later when fitting another stud I found the real reason. Again the stud tightened but this time a small piece of metal showed at the entrance to the crankcase mouth. I carefully removed the stud, examined the shard and all became clear. The crancase thread had obviously been stripped at some point and had been Helicoiled 9/16" UNF instead of 9/16 Cycle. The difference in TPI is only one or two but is enough to remove threads very easily! I managed to remove the Helicoil easily and fitted a new one.
Incidently, I had test fitted the other cylinder's barrel/head some weeks previously to take initial compression ratio readings (see Heads and Barrels section). I experienced that well known stomach churning feeling as the spanner turns but no resistance of the nut tightening is felt. As expected when I removed the barrel the thread had pulled fully out, which was very suprising considering it had felt fully ok when I originally fitted it. The upshot of this was that I not only had to buy a new 9/16" UNF Helicoil insert(s), but also a 9/16" UNF Helicoil Tap, which cost a fortune. This was even more infuriating when you consider that the tap's outer diameter was only 12 thou different from the standard 5/8" UNF tap I already possessed! Hey ho.
At this point I was faced with the rotten prospect of having to strip the fully assembled bottom end down again to ensure the stripped thread was bored and re-tapped parallel to the crankcase mouth. After much head scratching I came up with a far simpler solution, which if successful would save stripping the engine and guaruntee the thread went in absolutely square. I made up a special hollow stud that fitted through the head (which was placed in its approximate position using the 3 other studs as a guide, but no barrel) and fitted over the tap while it was cutting the new crankcase thread. As the cylinder head was held in situ by the remaining 3 studs it ensure the tap could not move off vertical, it worked a treat and meant I did not need to strip the engine. Finally, Graham Maughan made me 2 new Series 'B' outer studs, but fitted with 9/16" UNF lower threads. What a pallava!
The flywheels that came with the bike looked to be in quite good condition but the drive side mainshaft did not look perfect. As I had every intention at the time of racing the bike hard, I did not want to skimp in this area as the results could prove disastrous. I took them to Maughan's and they fitted new (standard size) mainshafts, then skimmed the outer faces absolutely true to the shafts. I ordered from them a set of Carillo conrods as one of the original Vincent rods was slightly pitted, again raising doubts for serious speed work. For those that have not seen Carillo rods, they are beautifully crafted steel rods of 'H' section made to very high standard in America. Used almost universally in all areas of motorsport, I read an article once describing how many operations each ingot of metal went through to get to the finished product, it was amazing.
I believe original Vincent Lightning rods were called Vibrac rods and were highly polished and of a slightly higher tensile strength than standard. Arguably though, even if I was to find a set, after so many years their condition today would be suspect.
Crankshaft before heavy weights added
Balancing Act
The rods, flywheels and a Maughan racing Big End were all assembled and
trued by Tony Maughan and from what he told me went together very well,
resulting in the whole assembly clocking to within 1 thou tolerance.
The finished crankshaft assembly was sprayed in Duck Oil, packed away
and left until last year when I came to balance them. I had fitted new
Little Ends to match the BSA B50 pistons I am going to use, but when I
checked the balance factor, found it was a mile out on the 46% I was aiming
for.
This was due to the extra weight of the Carillo rods, combined with the
extra weight of the new Little Ends. To get to a 46% balance factor meant
taking a lot of weight off the Big End side of the flywheels. I opened
up the existing holes as large as I dare but could not get anywhere close.
I was beginning to think I was running out of options so gave Steve a
ring at Maughans. He assured me this problem was not uncommon, especially
after fitting Carillo rods. Also, mine are slightly heavier than those
currently produced and are a fraction heavier still with B50 Llittle Ends
fitted.
To get round this problem Steve offered a very exotic service - the assembly
would be stripped, packed into custom made travelling boxes and sent to
a specialist company that would fit Heavy Metal inserts in to the outer
rim of the bobweight side. The flywheel assembly is then both Statically
and Dynamically balanced. This all went off according to plan and the
finished result can be seen in the accompanying photographs. Personally,
if I could get away with it with my wife, I would have the whole lot mounted
on the living room mantle piece for posterity!
I have now assembled the crankshaft in the crankcase and although it was
an extremely fiddly process, with the roller bearings steadfastly refusing
to go in to their outer races easily (I am sure most Vincent engine builders
will know what I am talking about here), the finished assembly certainly
spins beautifully freely. I just hope this continues after the engine
shock absorber has been bolted on.

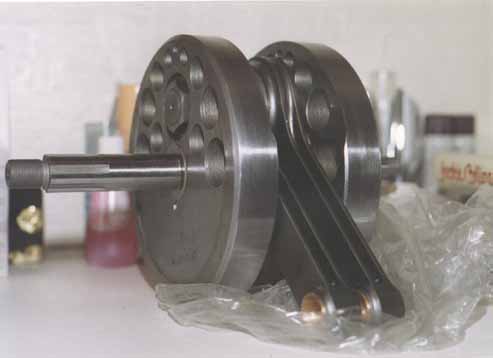
Completed crank after balancing for Carillo rods and heavier Little Ends

The heavy weights can just be made out on the rim (click on photo for enlargement)